


Very affordable 3D printer however, this is a kit that requires careful mechanical assembly. All electronics are preassembled. The supplied cables to connect the various assemblies are preassembled and seem to be perfect.
I didn't even try to follow the printed instructions because they are not very complete, and the print is tiny as someone previously noted. I used the " Magic User Guide FINAL.pdf" on a laptop computer that I placed specifically in the assembly area so I could follow the instructions precisely. This file was on the supplied SD card. It provided detailed instructions in perfect English (not in the usual terribly-translated from Chinese to English) and was capable of extreme zooming-in to view details when the detailed instructions presented precautions of incorrect assembly (the vertical aluminum pieces really should have been labeled as left and right as their holes are different). If you use the wrong part you'll have to take it apart and switch around the parts. They tell you that but they don't really tell you exactly what is different between the parts. Cable routing requires great attention during assembly. A video shows cable installation error results if you don't catch the detailed precautions at the extruder (failure to place cable in the cable clamp on the extruder as an oversight). Also, you must use extra cable ties to make it look like it does in their other videos otherwise the cables might hang up during movement. Cable ties are provided but you're not told where to put them on the printer in the manual. Obviously, all cable placements and paths need to be considered for bed and extruder movements in the various directions during assembly and in final placement. If you are going to put it in a cabinet you should allow extra space for bed cables to move freely.
After much research I am convinced that most people looking at these in this price range are doing this as a hobby or have significant prior experience using completed 3D printers. With absolutely no prior experience I (a retired, disabled veteran and senior citizen) purchased it to print what I consider to be unusual highly practical things: adapters for hoses, 12 to 16 gram CO2 cylinder adapter, caps for tubes of sealant/glue, boxes for electronic projects, and the like. No vases, art or toy projects just to prove I can print them.
I had little idea how it should look when completed or how to adjust it and start printing because I had dismissed 3D printers as very expensive and impractical when I first saw them at Microcenter many years ago and had ignored them ever since. Prices have dropped dramatically over the years since introduction and you can print a myriad of things at a reasonable price.
I knew it would interface with my Windows 10 computer but it wasn't easy. In case you are wondering yes, you can print from up to a maximum 32GB SD card (or yes, it works with a micro SD card with adapter) without using the computer connected directly to the printer. And, yes, you can find many items ready to print from the internet. If you want to design your own items, you can learn CAD and print your projects with this printer.
This printer is not directly supported in Windows 10. Once connected to a Windows 10 computer, it only shows up in Windows Device Manager under Ports (COM & LPT), USB-Serial CH340 (COMn) which is actually only the interface from the printer's computer TTL to the PC USB. Windows 10 automatically loaded the correct driver but if you're using an older version of Windows you might have to hunt down the drivers on the internet. It DOES NOT show up as a Windows printer even though the latest update to Windows 10 adds support for some 3D printers. This means you can't use most Windows 3D applications (apps) and you can't share the printer with your other networked Windows computers.
I found it worked well with the included JGCREAT Windows software that was supplied with the printer kit on an SD card even without having to specify which Com Port the printer is connected to. Unfortunately, after each print is complete the JGCREAT application must be closed and reopened with the next project. It works OK through a very long USB cable on either USB 2 or 3.0 ports.
Bed leveling must be done to print successfully. JGAurora3d has an excellent video showing the procedure however, I still haven't mastered the positional controls from the printer. Apparently I can't tell it to position for adjustment from Windows. I did manage to position bed height from the extruder at the proper height with the on printer controls then I carefully moved the extruder head and the bed around to all four corners and adjusted height with the adjuster wheels using copy paper as a feeler gauge.
It works. You don't need "build plate adhesion" in JGCREAT. If you use it you'll have an awful time getting the thin extra edges off the build surface. Trust me on this.
Upgrades? Sure. I've ordered several magnetic build plates so I can swap them out easily. Adhesion is fine with the heated bed and PLA filament. You won't need painter's tape (that blue tape) or some kind of high temperature tape and certainly not hair spray to get your parts to stick. The bed is true, so I don't see the point in getting a glass bed surface for now.
Add to your order
-
 Coverage for accidental damage including drops, spills, and broken parts, as well as breakdowns (plans vary)
 -
 24/7 support when you need it.
 -
 Quick, easy, and frustration-free claims.
Cover this product:
Cover all of your eligible devices:
Asurion Complete Protect: One plan covers all eligible past and future purchases (Renews Monthly Until Cancelled) $16.99/month
Select a plan
Add to your order
- Coverage for accidental damage including drops, spills, and broken parts, as well as breakdowns (plans vary)
- 24/7 support when you need it.
- Quick, easy, and frustration-free claims.
Cover this product:
Select a plan
Frequently bought together

$309.00
Get it May 29 - Jun 12
In stock
Usually ships within 4 to 5 days.
Total price:
To see our price, add these items to your cart.
Choose items to buy together.
Customers who viewed this item also viewed
Page 1 of 1 Start overPage 1 of 1
Videos
Page 1 of 1Start OverPage 1 of 1
Videos for this product

6:14
Click to play video
JGAURORA A5S unboxing/assembly
Customer Video
Videos for this product
0:19
Click to play video
Customer Review: Excellent printer featuring advanced functions
D Farr
Videos for this product
0:15
Click to play video
Printing PPE on the most reliable printer
Paul Warrick
Product Description


Why choose JGMAKER?
JGMAKER set up in 2009 with a mission to make 3D printing technology accessible to people at all levels by continuously providing better solutions that fit all business needs.
We has been serving different markets for over 10 years to provide high quality printer and excellent support
JGMAKER A5S with Metal Base
Fast assemble and Large size
- 2.8 inch colorful touch screen, assistant leveling system
- 32-bit motherboard, using Allegro A5984 stepper drivers with 32x microstepping
- Extruder will be stop heating up if no new filament feeding after one hour.
- Layer thickness : 0. 1-0. 3mm
- Filament Diameter: 1. 75mm
- Print speed:10-150mm
- nozzle diameter: 0. 4mm
- Machine weight: 13. 8KG

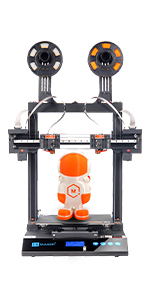
JGMAKER A5S 3D Pinter with Large Print Size: 305x305x320mm
- Large size can support printing various models, use the resume print or filament sensor to change color.
- The model can continue print from where the last stopped due to power failure or SD cardtake out by accident.
- The full-color LCD display with touch function and an icon-based user interface allows intuitive operation.
|
|
|
|
|---|---|---|
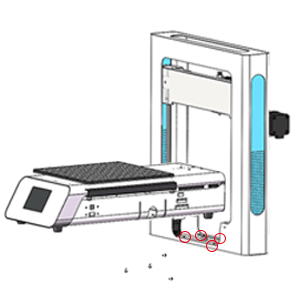
Modular assembly,easy and fast assemblyA5S comes with three big modulars : the frame, the Y-axis box and filament holder, simple construction of the whole machine. You only need to assemble a few screw, less than 30 minutes to build the printer |
Resume printPower Failure Protection: resume printing from where the last print was stopped due to power failure. Filament RUN-OUT detection: The machine beeps when your filament runs out to allow you to change the filament and avoid a failed print |
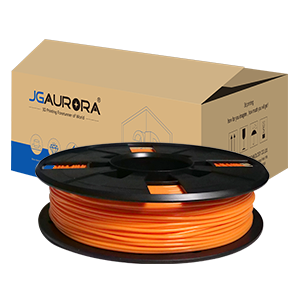
Package Include1xA5S 1x Spool filament PLA (0. 25KG) 1x Power Supply Cable 1x Quick start guide 1x Too box ( Hex Wrench Kit, extra nozzle and spare parts) 1x SD card (contains software, test sample files and operation manual) |
3D Print models


|

|
|

|

|
|
|---|---|---|---|---|---|
| JGMAKER A5S Large 3d printer kit | JG MAKER Magic 3d printer kit | JG MAKER Dual extruder 3d printer kit | JG MAKER Dual extruder 3d printer kit | K9 Pro Soap Dispenser | |
|
|
|
|
|||
| Customer Reviews |
610
|
610
|
28
|
28
|
— |
| Price | $309.00 | — | — | $499.99 | — |
| Print Size | 305x305x320mm (12x12x12.5in) | 220x220x250mm (8.6x8.6x9.8in) | 300x300x340mm (11.8x11.8x13.3in) | 300x300x340mm (11.8x11.8x13.3in) | Hand Soap Dispenser with Thermometer 2 in 1 |
| Compatible filament | ABS/PLA 1.75nn | ABS/PLA 1.75nn | ABS/PLA/PA/TPU 1.75mm | ABS/PLA/PA/TPU 1.75mm | Automatic Temperature Measurement and Disinfection Machine |
| Filament run out detection | ✓ | ✓ | ✓ | ✓ | |
| Heated Bed | ✓ | ✓ | ✓ | ✓ | |
| Slice software | Cura/JGcreat/Simply 3D | Cura/JGcreat/Simply 3D | Cura/JGcreat/Simply 3D | Cura/JGcreat/Simply 3D | |
| Magnetic platform | X | X | ✓ | ✓ | |
| Filament clean brush | X | X | ✓ | ✓ | |
| Color touch screen | ✓ | X | X | ✓ |
Reviews with images
A Real Point of View and Some Instructions for New Buyers.
Let me start off with saying I've been doing 3d printing for a long time now. I bought a Makerbot Replicator 2 when they first came out if that gives you any idea. So I've been in the game of 3d printing for quite some time.I bought this printer for my wife who is going to be doing some crafting and I wanted her to have her own dedicated printer. So I wanted to get one that would be easy enough for her to handle but yet had all the features I like to see in printers now. So lets jump right into the review.Packaging was great, and was double boxed from Amazon so thats always a plus. Tons of Foam holding everything in nice and tight. The skill of how the shrink wrap was done is amazing and everything required a sharp knife to open up (thats a good thing). After verifying all the parts they do even include a Spare parts bag in case you lose a T-Nut or screw which is very handy. It also comes with this little spatula and some test filament. My advice.. don't use the test filament. The stuff that came with mine looked like it had seen better days. If you don't have any filament then you will need to buy a spool. Hatch Box is one that's got a lot of Amazon Choice picks and works really good. Tons of reviews and prints really nice and its good for someone starting out since its not very expensive either.Assembly was easy, don't bother with the instruction sheet they give you, but instead just do the instructions off the SD Card thats included, you can zoom the PDF. The SD card reader they give you is for standard SD Cards and they give you an SDHC card that it can't read so be prepared for that. Save some of the larger foam blanks from the packaging trust me you'll need it! There is a part where you would basically be setting the print head down directly onto the build plate DON'T DO IT. Set it on the foam instead of the build plate. You'll thank me later by not having to replace the nozzle.In the install instructions they want you to use their config profile in Cura which locks the printer to no more than 30mm/s (thats pretty slow btw) for all movements.... However after playing with the software on the board I found that it can go all the way up to 80mm/s for printing and 100mm/s for just basic movements without extrusion. I tested it with a print and it worked granted going at full 80mm/s didn't result in the best quality but it worked just fine.I would recommend the default profile settings in Cura at 60mm/s as a good balance it runs smooth and doesn't take 4 days to print something of average size and the printer seems to handle it just fine. One HUGE thing, do NOT use Z Hop setting from Cura. It locks up the board and it has no idea what to do with that instruction and makes the printer freak out. I almost had to replace a stepper motor and a nozzle because of it.They include a removable build sheet (some call it a plate) thats a direct knock off of BuildTak, but it works good. They call it "Magnetic" its not, and has no magnets or metal in the removable build sheet. Plus the heat bed is aluminum. I'll let that sink in your brain for a moment. No issues with layer adhesion if you use it but it does pickup oils from your skin really well and that can cause problems. Using gloves is a good idea because then you can pickup the prints off the hot bed and pull them off much easier when they are warm. The cold plate is a pain to pull single lines of scrap filament off of. I have an old pair of grey leather bargain bin gloves (farmers gloves) you can get pretty much anywhere and they work perfect on protecting your hands from the heat.You can use blue 3M painters tape but for anything big forget it. Small stuff its fine with but large stuff it has issues with it for some reason. Also don't use the tape if you heat the bed above 60c because all your doing is cooking the tape and its no longer effective.Bed leveling is really easy on this, There is basically no detailed instructions on how to do it so here are your instructions. If you have dealt with printers before then you know this process and can skip the next paragraph.With the printer off tighten all the screws on the build plate (large knobs) A LOT. Remember, righty tighty lefty loosey.Once you think you have them down far enough turn the printer on.Select Prepare / then Auto Home.Once Its done then select Disable Steppers.Get an index card, any size. Make sure the print head nozzle doesn't come into contact with the build sheet. If it looks like it will then tighten the 4 knobs more until it clears it.Now move the print head nozzle and the print bed so the print nozzle is above 1 of the knobs. Slide the card between the nozzle and the build sheet and loosen or tighten the knob until moving the card feels a bit "snaggy" or rough. You want it to lightly snag not feel like 100 grit sand paper. Do the same to all 4 corners above the knobs. Do this until all of them feel they have the same level of resistance. Make sure you can still move the card completely out from under the nozzle and are still able to slide it between the build sheet and the nozzle without it ripping or tearing the card.Auto Home the printer again and your done leveling and ready to print.All the Resume print on Failed for (insert whatever reason here) kind of sorta work... some times it will repeat the same layer it was on which can cause problems. Other times if it had to resume the print more than 2 times it wouldn't or the printer would start acting weird and printing where it shouldn't be.We do have a small design flaw in this printer. It is on the Filament feed for the "filament sensor", its tipped downward at a 45 degree angle. To fix this, bend the support up to a full 90 strait up and down so the filament sensor is level. Then you'll have no feed issues with 1kg spools. It does work at a 45 but is a really tight bend if you have a full spool on it and causes the filament to bend very aggressively. I had to put a spool that was half used on it to get a good print out of it. First print with a brand new spool snapped the filament in half before the sensor due to the angle it was having to bend. If you don't want to bend the metal or are not strong enough for that, then look at printing a stand alone spool holder and remove the one it comes with. There are tons on Thing-a-verse that will work.So now to the ratings.Price: 5/5 ( I got it on Amazon Prime day at $179) non-sale I would call it a 4.5/5 comparing to other printers in the same price range. Compared to my Makerbot its a 20/5 since my Makerbot was a little over $2500 at the time and I've had to mod it and tweak the settings so much to get the same reliability of prints this can do.Assembly: 3/5 I give it this rating only if you never bought or built a printer before. For some one who has its a 5/5. There are common sense things thats not said in the instructions that you would know if you've been around these printers before. Like, don't let the print nozzle rest on the built plate while your screw it together kind of stuff. The instructions are pretty decent for a product like this (which I do honestly give props to them on this) however you still have some areas where you just have to figure it out. However if you've ever put together anything from IKEA by just looking at pictures then you're going to be just fine.Print Quality: 3.5/5 (I gave it a 3 for Amazon due to they don't do half stars). Only reason for this is because if your PLA filament is good in any other printer at 200c you'll need to run it at 210-212c in this one to get the same quality (my printers room temp is about 74F). I have a feeling the thermal settings are a bit "off" on this printer or the quality of heater they use is on the cheap side. It honestly could just be mine, but after adjusting the temps it was 4/5. It does maintain the temp you set it to very well but you do have to play and tweak with the temp settings for your print a bit to get the best quality. I still had some errors in the print and it was not 100% perfect but it was still a good quality print I would be willing to hand to a customer. These tests were done at 0.2mm layer height (see picture).Side note 1 on printing: We only use PLA and don't use ABS or PETG so I have no information on how well it is able to print those other filaments. The area in which our printers are in is vented but not well enough to IMO safely print ABS or any other material that might off gas toxins when heated.Side note 2 on printing: To secure the removable build sheet they give you binder clips... Here is a tip, only use 2 on the very back and 2 on the very right side of the build plate. Anywhere on the left side or the front the print head can collide with the binder clip during normal travel and bad things happen from there on out. You can use tape to secure the build sheet as well but its not as stable.Reliability: 2/5 Yeah, this ones a low mark. I've already had to re-initialize the firmware on the board 2 times due to weird errors. I had an error of "Bed Heater Fail" and I power cycled it 4 times and still wouldn't work. Re-initialized the firmware and bam its back to working so there's a bug somewhere in the software on that one. The board is a pretty generic board so I may replace it if it continues to have errors. Hardware-wise once its off and printing its rock solid. Just make sure you put a UPS (battery backup) on it so that you don't have to deal with weird power outage resume glitches because I wouldn't trust the resume function to work 100% every time.Remote printing with OctoPrint: 5/5 Had zero issues setting it up and it was off and printing within 10 minutes after adding the OctoPrint Plugin for Cura. It really works well with it. Also just to note, the Raspberry Pi 3 B+ is able to power the control board without the main power on. When your Pi is plugged in make sure your main power to the printer is turned on as well. Otherwise unplug it from the Pi when you turn the main power off.Things to consider: This printer comes with a main board that has no power surge protection at all. If the printer is off and you move a stepper motor, it will light up the board and surge power to it causing the LCD to light up. In my experience, this is normal for the cheap boards. Just be aware when moving steppers with it powered off. Also this printer doesn't keep a memory of where its steppers positions are. So before you do any function on the printer at all that the printer it self is going to move a stepper in anyway always auto home it first! In octoprint you can do this by using the terminal and sending the command G28.Overall I consider this printer to be a good buy and if I come across needing another small format printer I would more than likely pickup another one of these. They are quirky little printers but the cost is cheap enough to deal with any odd quirks.
Top reviews from the United States
There was a problem filtering reviews right now. Please try again later.
Reviewed in the United States on November 6, 2019
Reviewed in the United States on September 29, 2020

It’s Fantastic. He says it’s even better than the one that he had in class.
The printing is fast and the product quality is superb. My son loves his 3D printer. Since owning it he has done so much better on his project grades, there’s nothing like hands-on experience!
Set up was super easy, and it was literally almost ready to go right out of the box ,just a few screws here and there, The instructions were Very clear and very easy to follow.. and with its solid metal base, it’s extremely sturdy, and designed to last!
You can download the item you want online, either a car, a airplane, or a building ......or you can create anything you want with The software. He designed and made some tools, just today and he got and A plus!
Overall, this is a great model for professional results! Totally recommend this!

Sturdy machine, professional results!
Reviewed in the United States on September 29, 2020
With my kids distance-learning, during these uncertain times, school has been especially challenging us, even more so, for my highschooler who is enrolled in a trade class... Studying electrical engineering. His shop teacher required models to be made, we had no choice but to invest in a 3-D printer for him, looking for the best value, I decided on this model.. so happy I did!Reviewed in the United States on September 29, 2020
It’s Fantastic. He says it’s even better than the one that he had in class.
The printing is fast and the product quality is superb. My son loves his 3D printer. Since owning it he has done so much better on his project grades, there’s nothing like hands-on experience!
Set up was super easy, and it was literally almost ready to go right out of the box ,just a few screws here and there, The instructions were Very clear and very easy to follow.. and with its solid metal base, it’s extremely sturdy, and designed to last!
You can download the item you want online, either a car, a airplane, or a building ......or you can create anything you want with The software. He designed and made some tools, just today and he got and A plus!
Overall, this is a great model for professional results! Totally recommend this!
Images in this review


Reviewed in the United States on July 30, 2019
I bought this printer for my wife who is going to be doing some crafting and I wanted her to have her own dedicated printer. So I wanted to get one that would be easy enough for her to handle but yet had all the features I like to see in printers now. So lets jump right into the review.
Packaging was great, and was double boxed from Amazon so thats always a plus. Tons of Foam holding everything in nice and tight. The skill of how the shrink wrap was done is amazing and everything required a sharp knife to open up (thats a good thing). After verifying all the parts they do even include a Spare parts bag in case you lose a T-Nut or screw which is very handy. It also comes with this little spatula and some test filament. My advice.. don't use the test filament. The stuff that came with mine looked like it had seen better days. If you don't have any filament then you will need to buy a spool. Hatch Box is one that's got a lot of Amazon Choice picks and works really good. Tons of reviews and prints really nice and its good for someone starting out since its not very expensive either.
Assembly was easy, don't bother with the instruction sheet they give you, but instead just do the instructions off the SD Card thats included, you can zoom the PDF. The SD card reader they give you is for standard SD Cards and they give you an SDHC card that it can't read so be prepared for that. Save some of the larger foam blanks from the packaging trust me you'll need it! There is a part where you would basically be setting the print head down directly onto the build plate DON'T DO IT. Set it on the foam instead of the build plate. You'll thank me later by not having to replace the nozzle.
In the install instructions they want you to use their config profile in Cura which locks the printer to no more than 30mm/s (thats pretty slow btw) for all movements.... However after playing with the software on the board I found that it can go all the way up to 80mm/s for printing and 100mm/s for just basic movements without extrusion. I tested it with a print and it worked granted going at full 80mm/s didn't result in the best quality but it worked just fine.
I would recommend the default profile settings in Cura at 60mm/s as a good balance it runs smooth and doesn't take 4 days to print something of average size and the printer seems to handle it just fine. One HUGE thing, do NOT use Z Hop setting from Cura. It locks up the board and it has no idea what to do with that instruction and makes the printer freak out. I almost had to replace a stepper motor and a nozzle because of it.
They include a removable build sheet (some call it a plate) thats a direct knock off of BuildTak, but it works good. They call it "Magnetic" its not, and has no magnets or metal in the removable build sheet. Plus the heat bed is aluminum. I'll let that sink in your brain for a moment. No issues with layer adhesion if you use it but it does pickup oils from your skin really well and that can cause problems. Using gloves is a good idea because then you can pickup the prints off the hot bed and pull them off much easier when they are warm. The cold plate is a pain to pull single lines of scrap filament off of. I have an old pair of grey leather bargain bin gloves (farmers gloves) you can get pretty much anywhere and they work perfect on protecting your hands from the heat.
You can use blue 3M painters tape but for anything big forget it. Small stuff its fine with but large stuff it has issues with it for some reason. Also don't use the tape if you heat the bed above 60c because all your doing is cooking the tape and its no longer effective.
Bed leveling is really easy on this, There is basically no detailed instructions on how to do it so here are your instructions. If you have dealt with printers before then you know this process and can skip the next paragraph.
With the printer off tighten all the screws on the build plate (large knobs) A LOT. Remember, righty tighty lefty loosey.
Once you think you have them down far enough turn the printer on.
Select Prepare / then Auto Home.
Once Its done then select Disable Steppers.
Get an index card, any size. Make sure the print head nozzle doesn't come into contact with the build sheet. If it looks like it will then tighten the 4 knobs more until it clears it.
Now move the print head nozzle and the print bed so the print nozzle is above 1 of the knobs. Slide the card between the nozzle and the build sheet and loosen or tighten the knob until moving the card feels a bit "snaggy" or rough. You want it to lightly snag not feel like 100 grit sand paper. Do the same to all 4 corners above the knobs. Do this until all of them feel they have the same level of resistance. Make sure you can still move the card completely out from under the nozzle and are still able to slide it between the build sheet and the nozzle without it ripping or tearing the card.
Auto Home the printer again and your done leveling and ready to print.
All the Resume print on Failed for (insert whatever reason here) kind of sorta work... some times it will repeat the same layer it was on which can cause problems. Other times if it had to resume the print more than 2 times it wouldn't or the printer would start acting weird and printing where it shouldn't be.
We do have a small design flaw in this printer. It is on the Filament feed for the "filament sensor", its tipped downward at a 45 degree angle. To fix this, bend the support up to a full 90 strait up and down so the filament sensor is level. Then you'll have no feed issues with 1kg spools. It does work at a 45 but is a really tight bend if you have a full spool on it and causes the filament to bend very aggressively. I had to put a spool that was half used on it to get a good print out of it. First print with a brand new spool snapped the filament in half before the sensor due to the angle it was having to bend. If you don't want to bend the metal or are not strong enough for that, then look at printing a stand alone spool holder and remove the one it comes with. There are tons on Thing-a-verse that will work.
So now to the ratings.
Price: 5/5 ( I got it on Amazon Prime day at $179) non-sale I would call it a 4.5/5 comparing to other printers in the same price range. Compared to my Makerbot its a 20/5 since my Makerbot was a little over $2500 at the time and I've had to mod it and tweak the settings so much to get the same reliability of prints this can do.
Assembly: 3/5 I give it this rating only if you never bought or built a printer before. For some one who has its a 5/5. There are common sense things thats not said in the instructions that you would know if you've been around these printers before. Like, don't let the print nozzle rest on the built plate while your screw it together kind of stuff. The instructions are pretty decent for a product like this (which I do honestly give props to them on this) however you still have some areas where you just have to figure it out. However if you've ever put together anything from IKEA by just looking at pictures then you're going to be just fine.
Print Quality: 3.5/5 (I gave it a 3 for Amazon due to they don't do half stars). Only reason for this is because if your PLA filament is good in any other printer at 200c you'll need to run it at 210-212c in this one to get the same quality (my printers room temp is about 74F). I have a feeling the thermal settings are a bit "off" on this printer or the quality of heater they use is on the cheap side. It honestly could just be mine, but after adjusting the temps it was 4/5. It does maintain the temp you set it to very well but you do have to play and tweak with the temp settings for your print a bit to get the best quality. I still had some errors in the print and it was not 100% perfect but it was still a good quality print I would be willing to hand to a customer. These tests were done at 0.2mm layer height (see picture).
Side note 1 on printing: We only use PLA and don't use ABS or PETG so I have no information on how well it is able to print those other filaments. The area in which our printers are in is vented but not well enough to IMO safely print ABS or any other material that might off gas toxins when heated.
Side note 2 on printing: To secure the removable build sheet they give you binder clips... Here is a tip, only use 2 on the very back and 2 on the very right side of the build plate. Anywhere on the left side or the front the print head can collide with the binder clip during normal travel and bad things happen from there on out. You can use tape to secure the build sheet as well but its not as stable.
Reliability: 2/5 Yeah, this ones a low mark. I've already had to re-initialize the firmware on the board 2 times due to weird errors. I had an error of "Bed Heater Fail" and I power cycled it 4 times and still wouldn't work. Re-initialized the firmware and bam its back to working so there's a bug somewhere in the software on that one. The board is a pretty generic board so I may replace it if it continues to have errors. Hardware-wise once its off and printing its rock solid. Just make sure you put a UPS (battery backup) on it so that you don't have to deal with weird power outage resume glitches because I wouldn't trust the resume function to work 100% every time.
Remote printing with OctoPrint: 5/5 Had zero issues setting it up and it was off and printing within 10 minutes after adding the OctoPrint Plugin for Cura. It really works well with it. Also just to note, the Raspberry Pi 3 B+ is able to power the control board without the main power on. When your Pi is plugged in make sure your main power to the printer is turned on as well. Otherwise unplug it from the Pi when you turn the main power off.
Things to consider: This printer comes with a main board that has no power surge protection at all. If the printer is off and you move a stepper motor, it will light up the board and surge power to it causing the LCD to light up. In my experience, this is normal for the cheap boards. Just be aware when moving steppers with it powered off. Also this printer doesn't keep a memory of where its steppers positions are. So before you do any function on the printer at all that the printer it self is going to move a stepper in anyway always auto home it first! In octoprint you can do this by using the terminal and sending the command G28.
Overall I consider this printer to be a good buy and if I come across needing another small format printer I would more than likely pickup another one of these. They are quirky little printers but the cost is cheap enough to deal with any odd quirks.

A Real Point of View and Some Instructions for New Buyers.
Reviewed in the United States on July 30, 2019
Let me start off with saying I've been doing 3d printing for a long time now. I bought a Makerbot Replicator 2 when they first came out if that gives you any idea. So I've been in the game of 3d printing for quite some time.Reviewed in the United States on July 30, 2019
I bought this printer for my wife who is going to be doing some crafting and I wanted her to have her own dedicated printer. So I wanted to get one that would be easy enough for her to handle but yet had all the features I like to see in printers now. So lets jump right into the review.
Packaging was great, and was double boxed from Amazon so thats always a plus. Tons of Foam holding everything in nice and tight. The skill of how the shrink wrap was done is amazing and everything required a sharp knife to open up (thats a good thing). After verifying all the parts they do even include a Spare parts bag in case you lose a T-Nut or screw which is very handy. It also comes with this little spatula and some test filament. My advice.. don't use the test filament. The stuff that came with mine looked like it had seen better days. If you don't have any filament then you will need to buy a spool. Hatch Box is one that's got a lot of Amazon Choice picks and works really good. Tons of reviews and prints really nice and its good for someone starting out since its not very expensive either.
Assembly was easy, don't bother with the instruction sheet they give you, but instead just do the instructions off the SD Card thats included, you can zoom the PDF. The SD card reader they give you is for standard SD Cards and they give you an SDHC card that it can't read so be prepared for that. Save some of the larger foam blanks from the packaging trust me you'll need it! There is a part where you would basically be setting the print head down directly onto the build plate DON'T DO IT. Set it on the foam instead of the build plate. You'll thank me later by not having to replace the nozzle.
In the install instructions they want you to use their config profile in Cura which locks the printer to no more than 30mm/s (thats pretty slow btw) for all movements.... However after playing with the software on the board I found that it can go all the way up to 80mm/s for printing and 100mm/s for just basic movements without extrusion. I tested it with a print and it worked granted going at full 80mm/s didn't result in the best quality but it worked just fine.
I would recommend the default profile settings in Cura at 60mm/s as a good balance it runs smooth and doesn't take 4 days to print something of average size and the printer seems to handle it just fine. One HUGE thing, do NOT use Z Hop setting from Cura. It locks up the board and it has no idea what to do with that instruction and makes the printer freak out. I almost had to replace a stepper motor and a nozzle because of it.
They include a removable build sheet (some call it a plate) thats a direct knock off of BuildTak, but it works good. They call it "Magnetic" its not, and has no magnets or metal in the removable build sheet. Plus the heat bed is aluminum. I'll let that sink in your brain for a moment. No issues with layer adhesion if you use it but it does pickup oils from your skin really well and that can cause problems. Using gloves is a good idea because then you can pickup the prints off the hot bed and pull them off much easier when they are warm. The cold plate is a pain to pull single lines of scrap filament off of. I have an old pair of grey leather bargain bin gloves (farmers gloves) you can get pretty much anywhere and they work perfect on protecting your hands from the heat.
You can use blue 3M painters tape but for anything big forget it. Small stuff its fine with but large stuff it has issues with it for some reason. Also don't use the tape if you heat the bed above 60c because all your doing is cooking the tape and its no longer effective.
Bed leveling is really easy on this, There is basically no detailed instructions on how to do it so here are your instructions. If you have dealt with printers before then you know this process and can skip the next paragraph.
With the printer off tighten all the screws on the build plate (large knobs) A LOT. Remember, righty tighty lefty loosey.
Once you think you have them down far enough turn the printer on.
Select Prepare / then Auto Home.
Once Its done then select Disable Steppers.
Get an index card, any size. Make sure the print head nozzle doesn't come into contact with the build sheet. If it looks like it will then tighten the 4 knobs more until it clears it.
Now move the print head nozzle and the print bed so the print nozzle is above 1 of the knobs. Slide the card between the nozzle and the build sheet and loosen or tighten the knob until moving the card feels a bit "snaggy" or rough. You want it to lightly snag not feel like 100 grit sand paper. Do the same to all 4 corners above the knobs. Do this until all of them feel they have the same level of resistance. Make sure you can still move the card completely out from under the nozzle and are still able to slide it between the build sheet and the nozzle without it ripping or tearing the card.
Auto Home the printer again and your done leveling and ready to print.
All the Resume print on Failed for (insert whatever reason here) kind of sorta work... some times it will repeat the same layer it was on which can cause problems. Other times if it had to resume the print more than 2 times it wouldn't or the printer would start acting weird and printing where it shouldn't be.
We do have a small design flaw in this printer. It is on the Filament feed for the "filament sensor", its tipped downward at a 45 degree angle. To fix this, bend the support up to a full 90 strait up and down so the filament sensor is level. Then you'll have no feed issues with 1kg spools. It does work at a 45 but is a really tight bend if you have a full spool on it and causes the filament to bend very aggressively. I had to put a spool that was half used on it to get a good print out of it. First print with a brand new spool snapped the filament in half before the sensor due to the angle it was having to bend. If you don't want to bend the metal or are not strong enough for that, then look at printing a stand alone spool holder and remove the one it comes with. There are tons on Thing-a-verse that will work.
So now to the ratings.
Price: 5/5 ( I got it on Amazon Prime day at $179) non-sale I would call it a 4.5/5 comparing to other printers in the same price range. Compared to my Makerbot its a 20/5 since my Makerbot was a little over $2500 at the time and I've had to mod it and tweak the settings so much to get the same reliability of prints this can do.
Assembly: 3/5 I give it this rating only if you never bought or built a printer before. For some one who has its a 5/5. There are common sense things thats not said in the instructions that you would know if you've been around these printers before. Like, don't let the print nozzle rest on the built plate while your screw it together kind of stuff. The instructions are pretty decent for a product like this (which I do honestly give props to them on this) however you still have some areas where you just have to figure it out. However if you've ever put together anything from IKEA by just looking at pictures then you're going to be just fine.
Print Quality: 3.5/5 (I gave it a 3 for Amazon due to they don't do half stars). Only reason for this is because if your PLA filament is good in any other printer at 200c you'll need to run it at 210-212c in this one to get the same quality (my printers room temp is about 74F). I have a feeling the thermal settings are a bit "off" on this printer or the quality of heater they use is on the cheap side. It honestly could just be mine, but after adjusting the temps it was 4/5. It does maintain the temp you set it to very well but you do have to play and tweak with the temp settings for your print a bit to get the best quality. I still had some errors in the print and it was not 100% perfect but it was still a good quality print I would be willing to hand to a customer. These tests were done at 0.2mm layer height (see picture).
Side note 1 on printing: We only use PLA and don't use ABS or PETG so I have no information on how well it is able to print those other filaments. The area in which our printers are in is vented but not well enough to IMO safely print ABS or any other material that might off gas toxins when heated.
Side note 2 on printing: To secure the removable build sheet they give you binder clips... Here is a tip, only use 2 on the very back and 2 on the very right side of the build plate. Anywhere on the left side or the front the print head can collide with the binder clip during normal travel and bad things happen from there on out. You can use tape to secure the build sheet as well but its not as stable.
Reliability: 2/5 Yeah, this ones a low mark. I've already had to re-initialize the firmware on the board 2 times due to weird errors. I had an error of "Bed Heater Fail" and I power cycled it 4 times and still wouldn't work. Re-initialized the firmware and bam its back to working so there's a bug somewhere in the software on that one. The board is a pretty generic board so I may replace it if it continues to have errors. Hardware-wise once its off and printing its rock solid. Just make sure you put a UPS (battery backup) on it so that you don't have to deal with weird power outage resume glitches because I wouldn't trust the resume function to work 100% every time.
Remote printing with OctoPrint: 5/5 Had zero issues setting it up and it was off and printing within 10 minutes after adding the OctoPrint Plugin for Cura. It really works well with it. Also just to note, the Raspberry Pi 3 B+ is able to power the control board without the main power on. When your Pi is plugged in make sure your main power to the printer is turned on as well. Otherwise unplug it from the Pi when you turn the main power off.
Things to consider: This printer comes with a main board that has no power surge protection at all. If the printer is off and you move a stepper motor, it will light up the board and surge power to it causing the LCD to light up. In my experience, this is normal for the cheap boards. Just be aware when moving steppers with it powered off. Also this printer doesn't keep a memory of where its steppers positions are. So before you do any function on the printer at all that the printer it self is going to move a stepper in anyway always auto home it first! In octoprint you can do this by using the terminal and sending the command G28.
Overall I consider this printer to be a good buy and if I come across needing another small format printer I would more than likely pickup another one of these. They are quirky little printers but the cost is cheap enough to deal with any odd quirks.
Images in this review


Top reviews from other countries

Rob
Bottom line: Bit fiddly but very good.
Reviewed in Canada on March 30, 2021Rob
Reviewed in Canada on March 30, 2021
/This printer does NOT like modification at all. If you are trying to buy cheap then modify to upgrade do not!! It's better to just buy into a slightly higher price range. It will cost you more to upgrade than ever. It uses specialty parts this one.../
Stock: works out of the box, will print just fine as-is!!! And you can set and forget it's very reliable so far, where I watch it to be sure for 20 min... for nothing really...its fine doing its printing alone unwatched totally stock. The only thing when stock is the noise... It will make everything and everyone around you your enemy. Rocks outside will hate the noise. BUT this is actually normal for 3d printers, not just this one. Just be sure you are very comfortable, in your own house basement ( no apartment!!) etc and noise is fine.
Rest of the pictures are this printer modified (it didn't like this. Tinkering..) to reduce noise. Note: some version come with end motor gears pressed on! This is super hard to modify do not even bother. Mine came with c-clamp ends (thank you!!) , so I could remove the end gears, used standard autoshop gasket rubber ( nema will Not fit!! warning!! Huge grinder mods if you try on this model!!) as the gasket alone provide same approx thickness, but won't hit the back stepper motor. I put the gasket everywhere. Tighten up. The gear belt spacing is almost exactly at the end of the shaft Vs c-clamp distance! Like 2mm for the gears when back on.
The fans are 1x blower and 1x regular, voltage is different care when ordering!! I changed them for 2x 40mm regular fan non blower silent ones. I didn't go nocturnal because of the voltage difference but others work fine and are just as quiet. Your 1st print is the fan enclosure on thingiverse to use them. Note: I redesigned mine as I hate blowers, order one if you can't really redesign for standard. (This is the green box being printed in picture.)
These mods dropped the sound levels drastically. I own a cr10 full silent upgraded. This one is nowhere near nema damper and high end stepper quiet - but now with the simple mods no more rocks are being thrown through my window in hatred of the noise ( it's the vibration people hate..it's really annoying tbh) I would say this is about 1/3 noise If that VS near silent modded cr10. Still vastly better than stock.
You need these mods trying to do like me at a base level if nothing more: rubber gasket sheet. A 10x10" sheet 2-3mm thick is plenty, then you need the new gear teeth called " timing belt pully gears" 5/8mm with 20 teeth, and most importantly 1 or two outdoor paving concrete blocks, like for patios to sit the printer on. Or else the noise is biblical hehe. Don't forget the stone!!
The last noise DB picture is middle of the room with it running. It's on a hollow table no stone! ( table too cheap) so I can actually get it a bit quieter on a more solid base + stone. That is really just the rubber mods doing their thing in this DB sound picture.
Overall:
-> I just want a printer and don't care about anything else. just make it work out of the box - yes buy it.
-> I just want a cheap one I can mess around with and upgrade to a supercar and win laps - not it. Bump your price range higher.
-> I own a few printers already and like tinkering, using alt parts on hand etc. Yep buy it, it's a good fun one but prep for some upgrade walls and frustration. Once ironed out it will probably run 24/7.
Images in this review


Amazon Customer
Awesome machine. 10/10 recommended
Reviewed in Canada on August 19, 2020Amazon Customer
Reviewed in Canada on August 19, 2020
I have several JGMaker/JGAurora printers and I've never been disappointed and this is no exception. the only problem I faced was bed leveling, even with the assistance from the on board software it took me a long time to get right. however, after getting the bed fully leveled, there was no slag overtime, so once it's leveled your good don't touch it. truly an amazing machine! it dosent come with any sample filament tho so if your going to buy it, grab some.
Images in this review


IndyToronto
Excellent value for a mid size 3D FDM printer
Reviewed in Canada on January 4, 2021IndyToronto
Reviewed in Canada on January 4, 2021
It does have a DIY look and the bottom where the power supply and PCBs sit are exposed but this is pretty standard for this kind of DIY printers.
I used the printer heavily and have gone through 5kg worth of filaments so far printing over a hundred pieces of objects through dozens of projects ( including 2 large push plate jigs I use for woodworking).
By only careful height levelling, I was able to print directly onto a glass mirror without glue --- this allowed me to print objects that have a perfect mirror face which is extremely useful when I designed and printed out my garage parking sign.
I did have to replace the nozzle once when I wasn't paying attention and a filament got stuck overnight and and the nozzle got completely stuck with burnt hardened carbon but the replacement was also easy.
Images in this review

